Form builder
The builder lives at Keno Forms > Settings > Builder. It is deliberately simple: enough to compose a lead-capture form, not a general survey engine.
Fields
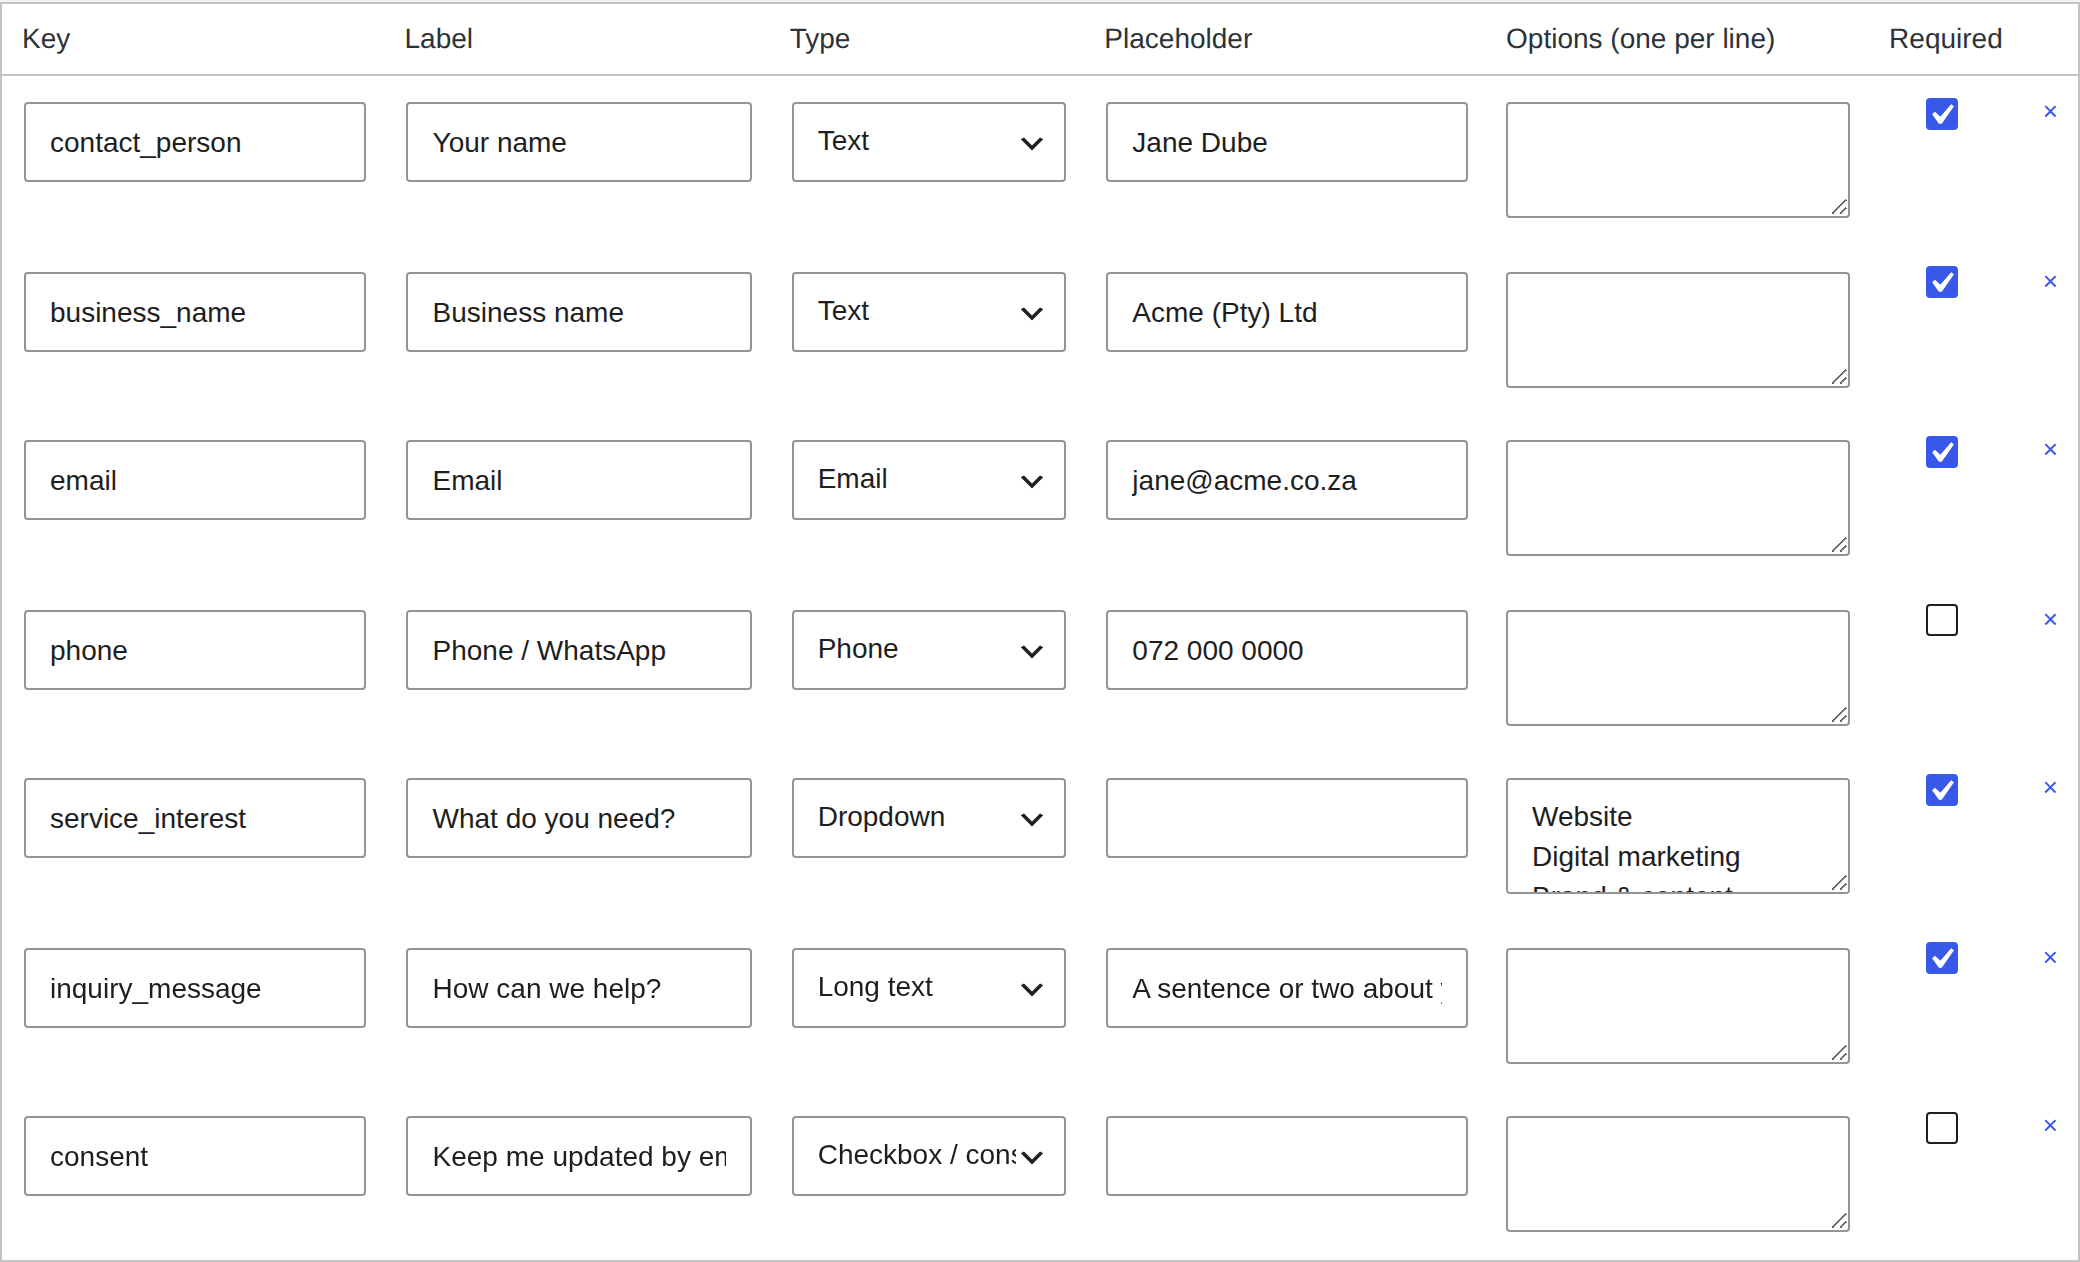
Each field has a key, a label, a type, an optional placeholder, and a required toggle. Add a field with + Add field, drag nothing and type everything: reorder by moving rows, remove with the row's remove control.
Field types
| Type | Use |
|---|---|
| Text | Single-line text (names, company). |
| Validated email address. | |
| Phone | Telephone / WhatsApp number. |
| Number | A numeric value, validated as a number. |
| Website / URL | A URL, validated and stored safely. |
| Date | A date picker (stored as YYYY-MM-DD). |
| Long text | Multi-line message. |
| Dropdown | A select. Put one option per line in the Options box. |
| Radio buttons | A single choice shown inline. One option per line in Options. |
| Checkbox / consent | A single checkbox. Use it for the marketing opt-in. |
| Hidden | A hidden value passed through with the submission. |
The key is how the value is stored and mapped to your CRM. The default form
uses conventional keys (contact_person, business_name, email, phone,
inquiry_message, consent) that the CRM providers already understand, so keep
those keys if you want zero-config CRM mapping.
Every field renders with a proper <label>, required fields carry
aria-required, and radio groups use a labelled radiogroup, so forms stay
keyboard-navigable and screen-reader friendly out of the box.
Templates
Rather than start from a blank form, pick a template at the top of the Builder tab and save: it replaces the current fields with a ready-made set you can then edit. Four ship in v1:
- Lead capture (the default): name, business, email, phone, service interest, message, consent.
- Newsletter signup: name, email, consent.
- Support request: name, email, priority (radio), message.
- Quote request: contact, business, email, phone, budget, needed-by date, and project details.
The consent checkbox
A checkbox field named consent drives the
marketing list opt-in: when the visitor ticks
it, and you have a marketing provider configured, the contact is subscribed to
your list. Leave it unticked and no marketing subscribe happens.
Form settings
Above the fields you can set:
- Submit button text
- Success message shown after a valid submission
- Redirect URL (optional): send the visitor to a thank-you page instead of showing the success message
- Honeypot: keep this on unless you have a specific reason not to (see Spam protection)
How it is stored
A form is a small JSON definition read by both the renderer and the validator, so a field change takes effect immediately with no code and no template edits.